Three point lighting can mean any lighting set up that uses, (you guessed it!), three lights. Somewhere in your camera or speedlite manual there is a hastily drawn diagram illustrating a simple 3 point lighting arrangement.
Word of caution though, those diagrams are terrible and will probably leave you in a lurch when photo-time arrives and you go to take your first picture only to realize that your lighting set-up isn’t gonna cut it.
The lighting scheme I am going to share with you today is an alternate set-up; and when done right it opens the doors to some pretty interesting possibilities. First, let’s discus what you’ll need:
- Three lights
- 2 strip light soft boxes
- 1 umbrella/medium soft box/octobox
The biggest difference between this set up and the ones you’ll more commonly find online is that two of our lights will be effectively behind and to the sides of our subject, rather than two lights in front.

Diagram of our 3 Point Lighting Technique.
I forgot to get a good production photo during the shoot. Which by the way, is a no no. You should always get a good production photo during the photo session so, if you have to come back and revisit the set for pick-ups, you’ll have a good visual reference to which you can match the lighting accurately. Luckily, I’m familiar with this set up, so not having a production photo isn’t too bad in this case.
This diagram to the left illustrates the basics of the set up. Two strip lights behind the subject, and one light in front of the subject. The lights in the back are positioned so that they are pointed at the subject’s shoulders. The vertical height of the lights depends on the height of your subject.
With strip lights, it’s important to know that even though they may be very tall, the ‘hot-spot’ of light is still centered in the middle of the box. That means I usually end up adjusting my strip lights so that the middle of the box is lined up with the top of my subject’s shoulders. If that isn’t giving you enough vertical coverage, then tip your strip lights so the top of the box is leaning towards your subject. Why does this work? A light source appears brighter the closer you are to it. Tipping the top of the strip light towards your subject will project more light onto their head, while the brighter middle area of the light will be a bit more dim because it’s slightly further away. Using the inverse-kinematic laws of light to your advantage, how cool is that!?
The light in front of our subject was a 22″ beauty dish. This doesn’t have to be a beauty dish, however. It can be an umbrella, a soft box, even a huge octobox. For our purposes, however, we were going for a slightly zappier, edgier light so a beauty dish was the perfect choice.
We placed the beauty dish on a C-Stand with a boom arm and leavered it over our subject. The light should be just high enough to be out of the frame of our picture. You don’t want it too high, or else you’ll fill your subjects eyes and cheeks with shadows. Keeping it just above the camera’s line of sight will render some nice shadows while still dishing some light into the eyes.

Strip Lights
For this photo, we really want the edges of our subject to be defined. For this reason, I suggest you adjust the power output of your strip lights before you start fiddling with your main light. I know this is a little backwards from conventional lighting logic, but these strip lights are tasked with making our subject pop out of the background so this is where most of our lighting power will be coming from.
You can tell that you’ve done it right when you do a test shot and your subject is completely outlined in light, but the center of the subject’s face is in near-total darkness.

Main Light
Next step is to dial in your main light. In our case, it’s the 22″ beauty dish from Paul C. Buff. Also, making it’s debut in my studio, is the PCB Einstein. I’ll get to the specifics of this light a little later on this post, but for now let me just say this: WOW, this light is awesome.
Okay, back to the Beauty dish. Once you have your strip lights producing the right amount of edge lighting on your subject, you are ready to introduce your main light. Start low, as in, power that light all of the way down. We’re trying to add just enough light to bring out the eyes and the features of the face. More precisely, you’re aiming for something like 1 stop under what would be considered optimal exposure. If your studio light doesn’t go low enough in power, just walk the light away from your subject until it looks right.
In my case, the light was about 2 feet away from the subject, with Einstein running at 1 stop above it’s minimum power. For my beauty dish, I am using a sock diffuser to help spread a little light into the shadows – but even with a diffuser on a beauty dish, your light will remain relatively sharp.
Compare the image to the left with the one earlier. You can see that the main light adds a subtle, but dramatic difference.
Using this lighting set-up gives you a very striking final frame. The edge lighting lifts the subject off the background and the main light adds a ton of mood to the portrait – but don’t stop there!
This lighting set-up can be used outside of the studio. It will work with nearly any suitably moody envorinment. It is, perhaps, a little too dramatic for corporate portraiture, but it works great on athletes, or theatrical personalities.
This technique also works particularly well if you are doing a composite image. So, how do we go about doing that? Well, let’s explore further!
The Background
I started this project knowing that it would ultimately end as a composite in Photoshop. I shot our subject on a gray seamless because the background doesn’t really matter. The gray just gives me a nice blank color to lift our subject off of in Photoshop later. So that leaves us with the question, “What is our background going to be?”
Well, it’s a sports themed shoot, so I went out scouting for sports themed locations. The locations don’t have to be specifically tied to sports either. Basketball, for instance, has a long history of being played in run-down inner-city courts. So go find a shabby court, or even an old alley way. You just need to tie the background to personality of the photo.

I decided to be a little more specific with my photo and I drove around town looking for a suitable series of locations that would match my pictures. I finally found a high school football field that would work perfectly for what I had in mind.
I walked around the field until I decided on a composition and then I began to shoot bracketed shots. The reason for the bracketed shots was because I knew I would be merging these into an HDR image. Why HDR? Well, the light on our subject is dramatic, so the background should be dramatic too!
The picture to the left represents the HDR we’ll be using in our final photo. I created this by merging 3 photos in Photomatix and then Tone Mapping the result in lightroom. You can use whatever process you are most comfortable with in terms of your own HDR images.
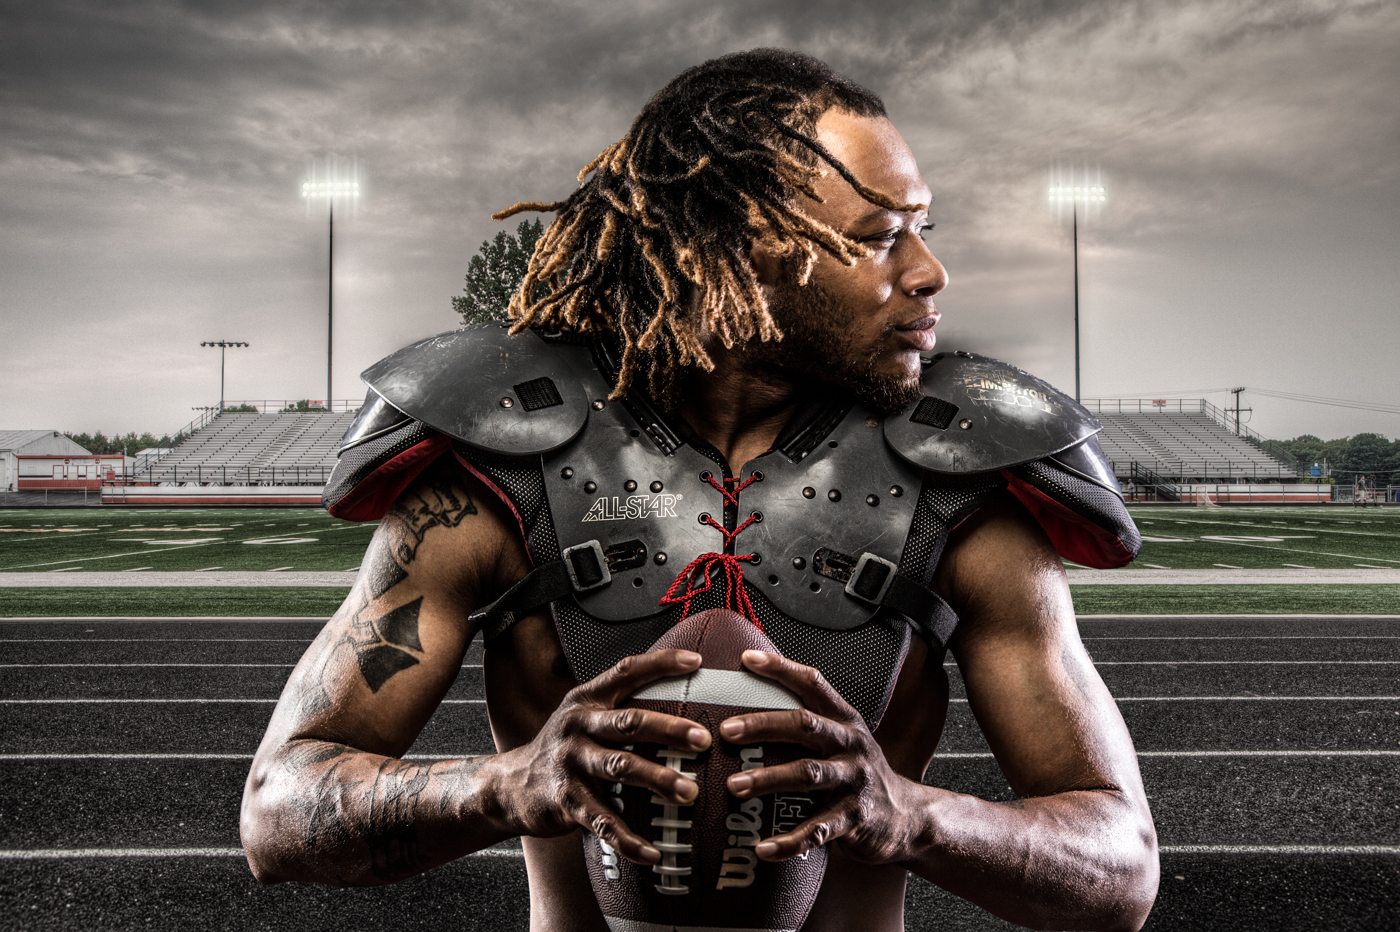
Once we’ve gotten our background prepped, and we’ve cut our subject free from his gray background it’s time to marry to the images into one composite.
How you put your photos together, and the visual treatments you apply are completely up to you. There’s no real step-by-step, and it all comes down to personal style. Since my vision was to have a gritty sports portrait, I spent a lot of time making sure the final image conveyed the attitude I wanted. I also spent a lot of time doing things we normally do with our portraits; retouching, dodging & burning, liquefying, etc…
Below is the final export.

Final Thoughts and little more about the Einstein Light.
I’ll be writing up a full review on the Einstein within the next day or so, but I just wanted to quickly add how impressed I am by it’s features and performance. It played a large part in allowing me to achieve the image I wanted.
In regards to the lighting scheme I’ve laid forth in this post, I just wanted to say it’s not something I came up with on my own. I’ve seen a lot of great work from great photographers, all of which have influenced the way I approached this particular project. I suggest you go out and get inspired too!