All my friends know that Autumn is my favorite time of the year. I love the colors, the cooler weather and most importantly — Halloween! So, for this little info-tutorial-lesson I decided to merge both of these beloved concepts.
The defining element of Autumn is the range of colors the season brings. Lush green forests and lawns are replaced by seas of yellow, orange and red when trees begin to drop their leaves as they go dormant for the upcoming winter months.
As photographers with a lot of tools at our disposal, we sometimes spend too much time trying to change the scene so the camera matches what’s in our mind’s eye. When that fails we spend more time changing the scene even more; lighting, gobos, set dressing, camera angles and probably a lot more lighting on top of that. Creating a scene is at the core of what we’re trying to do as commercial photographers – we are trying to make a visual story here, after all. However, one fundamental rule that we often lose sight of early in the process is the practice of trying to get our environment to work with us. What often happens, unfortunately, is we end up nullifying it completely with a bunch of gadgets.

A magenta filter can help add vibrancy to a fall landscape, or make your blood stained shirt look even more amazing!
The Fall season is a perfect time for portraits and outdoor photography. The sun sets early, giving us great light and the colors are vibrant. Because of this, when you’re approaching a Fall portrait you are probably thinking of how you can maximum your environment to help create a gorgeous photo, constructed to take advantage of the natural landscape around you. You could probably go with just your camera at sunset and capture a stunning photo, and that would play right into the concept of not-overdoing it with too much equipment. But I think with some very smart choices in gear, mainly 1 flash, one color filter and one corrective flash gel, you can dial the autumnal ambiance up to 11.
First, let’s talk about the colored lens filter. Because Fall is filled with reds, oranges and yellows, I like to use magenta filters. Magenta filters at sunset in the middle of Autumn are a magical device. They shift everything in a deeper shade of red. A warm sunset will explode into an almost fantasy-painting skyline. Cooler, green fields of grass will take on a warmer tone, and the leaves that have either fallen or have started to turn on the trees will become even more vivid.
I recommend the Tiffen 77mm 30 Filter (Magenta). It’s nothing fancy, and at $60 it’s cheap enough to fit in your camera bag without breaking the bank. I’ve used it for a while now and it does the job it’s intended to flawlessly.
The next piece of gear is a color corrective gel that you’ll place over your flash. For this, we’re using a green corrective gel. Most gel sets you buy have a corrective gel for any lighting situation, and for our purposes the green gels normally used for florescent color correction should work well. If your gel kit has more than one shade of corrective green, you may have to test each one out to find which yields the best result.
The last piece of gear is a flash – any flash will do, speedlite or studio will work. Here we using an older canon 430ex II.
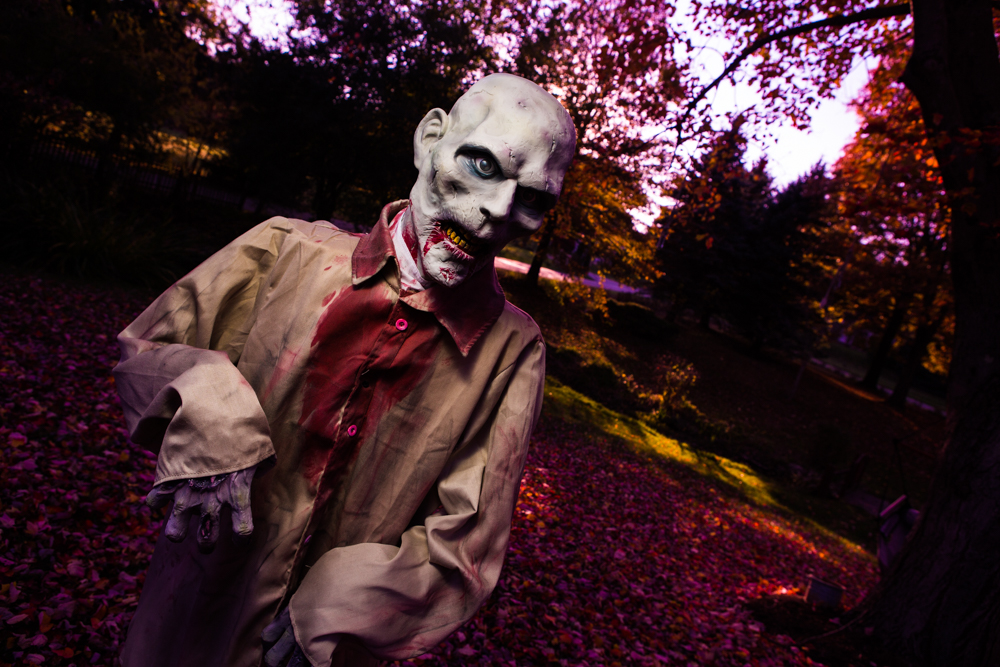
Tim the Zombie
The set up for all of this is pretty simple: Place your filter on your camera, the gel on your light, position and frame your subject and start taking photos. The only trick here is that you’re trying to light the subject solely with your flash, and not so much with ambient light. The flash, with it’s corrective gel cancels out the magenta lens filter. The end result is your background will be bathed in a vivid magenta color while your subject should retain their natural skin tones.
Here to the right, as an example (and to fulfill my promise of merging a Halloween theme into this post) is Tim the Zombie. We’re using the set up described above, making sure the light from the flash covers the main focus of our Zombie model. The background, out of reach from the flash’s output, is saturated in a glorious shade of magenta – bringing the colors of the fall landscape to life. My settings for this photo: 1/60 shutter speed, 200 ISO @ f/7.1. These settings allowed me to underexpose the background by 1 stop, thus deepening the effect of the magenta filter even more. The flash has +.6 flash compensation dialed in to expose correctly for our zombie.
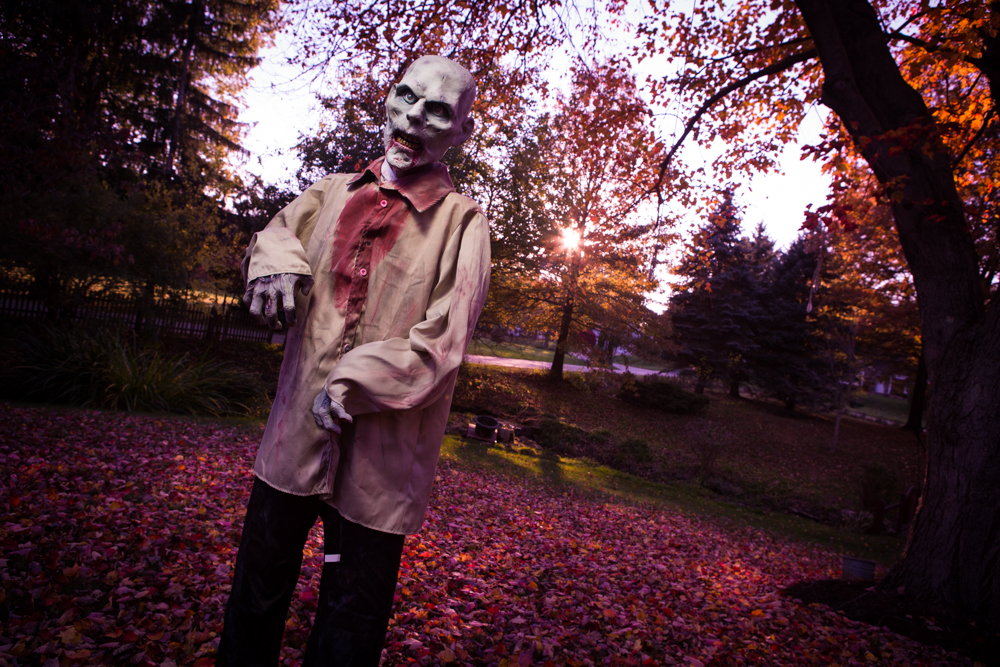
To give you a better idea of the interaction between ambient light, gelled flash and filtered lens, here is a series of photos illustrating the effect each element has on your photo.

Here is our Zombie without lights, gels or filters. This is pure natural lighting. Notice the colors of the background. You can tell it’s Fall and the richness of the leaves is evident.
 This is the result of adding a flash with a green corrective gel. The background color remains the same, but our zombie takes on a greenish color
 We remove the green gel from the light and in its place we add the magenta filter to our lens. When we take the picture we can see the background suddenly comes to life with very saturated colors – thus becoming more dramatic. Our zombie, however, looks like a mess.
When we put all of these elements together we achieve a much more striking photo – combining great color on both the foreground subject as well as increasing the drama in the background. One great side effect of this technique is that the subject of your photo really lifts away from the background, giving them a strong visual POP from the rest of the photo.
One question that may come up while reading this would be, “Can’t I just do this effect in post?” The obvious answer is yes. But considering that it took me less than 20 seconds to screw a magenta filter onto the lens and even less time to fit a gel onto a speedlite it’s pretty clear that approaching this photo in a more analog fashion will both save you time and give you an authentic result. And remember, this is coming from a guy who lives half of his life in post production.
And don’t forget that you can different results by combining different combinations of filters and gels. For example, a magenta gel with a green filter will push your photos into a realm of deep green – something to consider when shooting in a lush forest setting. A blue filter in tandem with an orange gel will turn your ocean portraits an even deeper shade of blue. So just get out there and play around!