You don't need a massive studio and an army of gear to shoot great product photos.
I’ve moved 3 times in the past 8 years and have created 5 in-home studios in that same amount of time. Every time I change up my studio I seem to find myself creating smaller, more compact and optimized spaces. The reason is simple – you don’t need a warehouse to take great product photos.
The first step to creating your space is taking inventory of your most used gear – this single step will let you know exactly what sort of space you need. For instance if you rely heavily on natural light then you’ll need windows and perhaps less space for things like studio flashes and light stands. The type of photographs you take will also help inform you decisions on what type of space you need. In my case, I do a lot of portraits and commercial work. I also use studio flash which are often mounted on large C-Stands so that definitely increases both my vertical and horizontal space requirements.
In the end, I utilized a room attached to my house that is 24 feet by 10 feet. This room also has high ceilings, which means I can position my lights above my subjects. After doing some searching online, it turns out that even a compact space like this is pretty large compared to some metropolitan studios out there. I found some studios that are only 8×8, which is impressive!
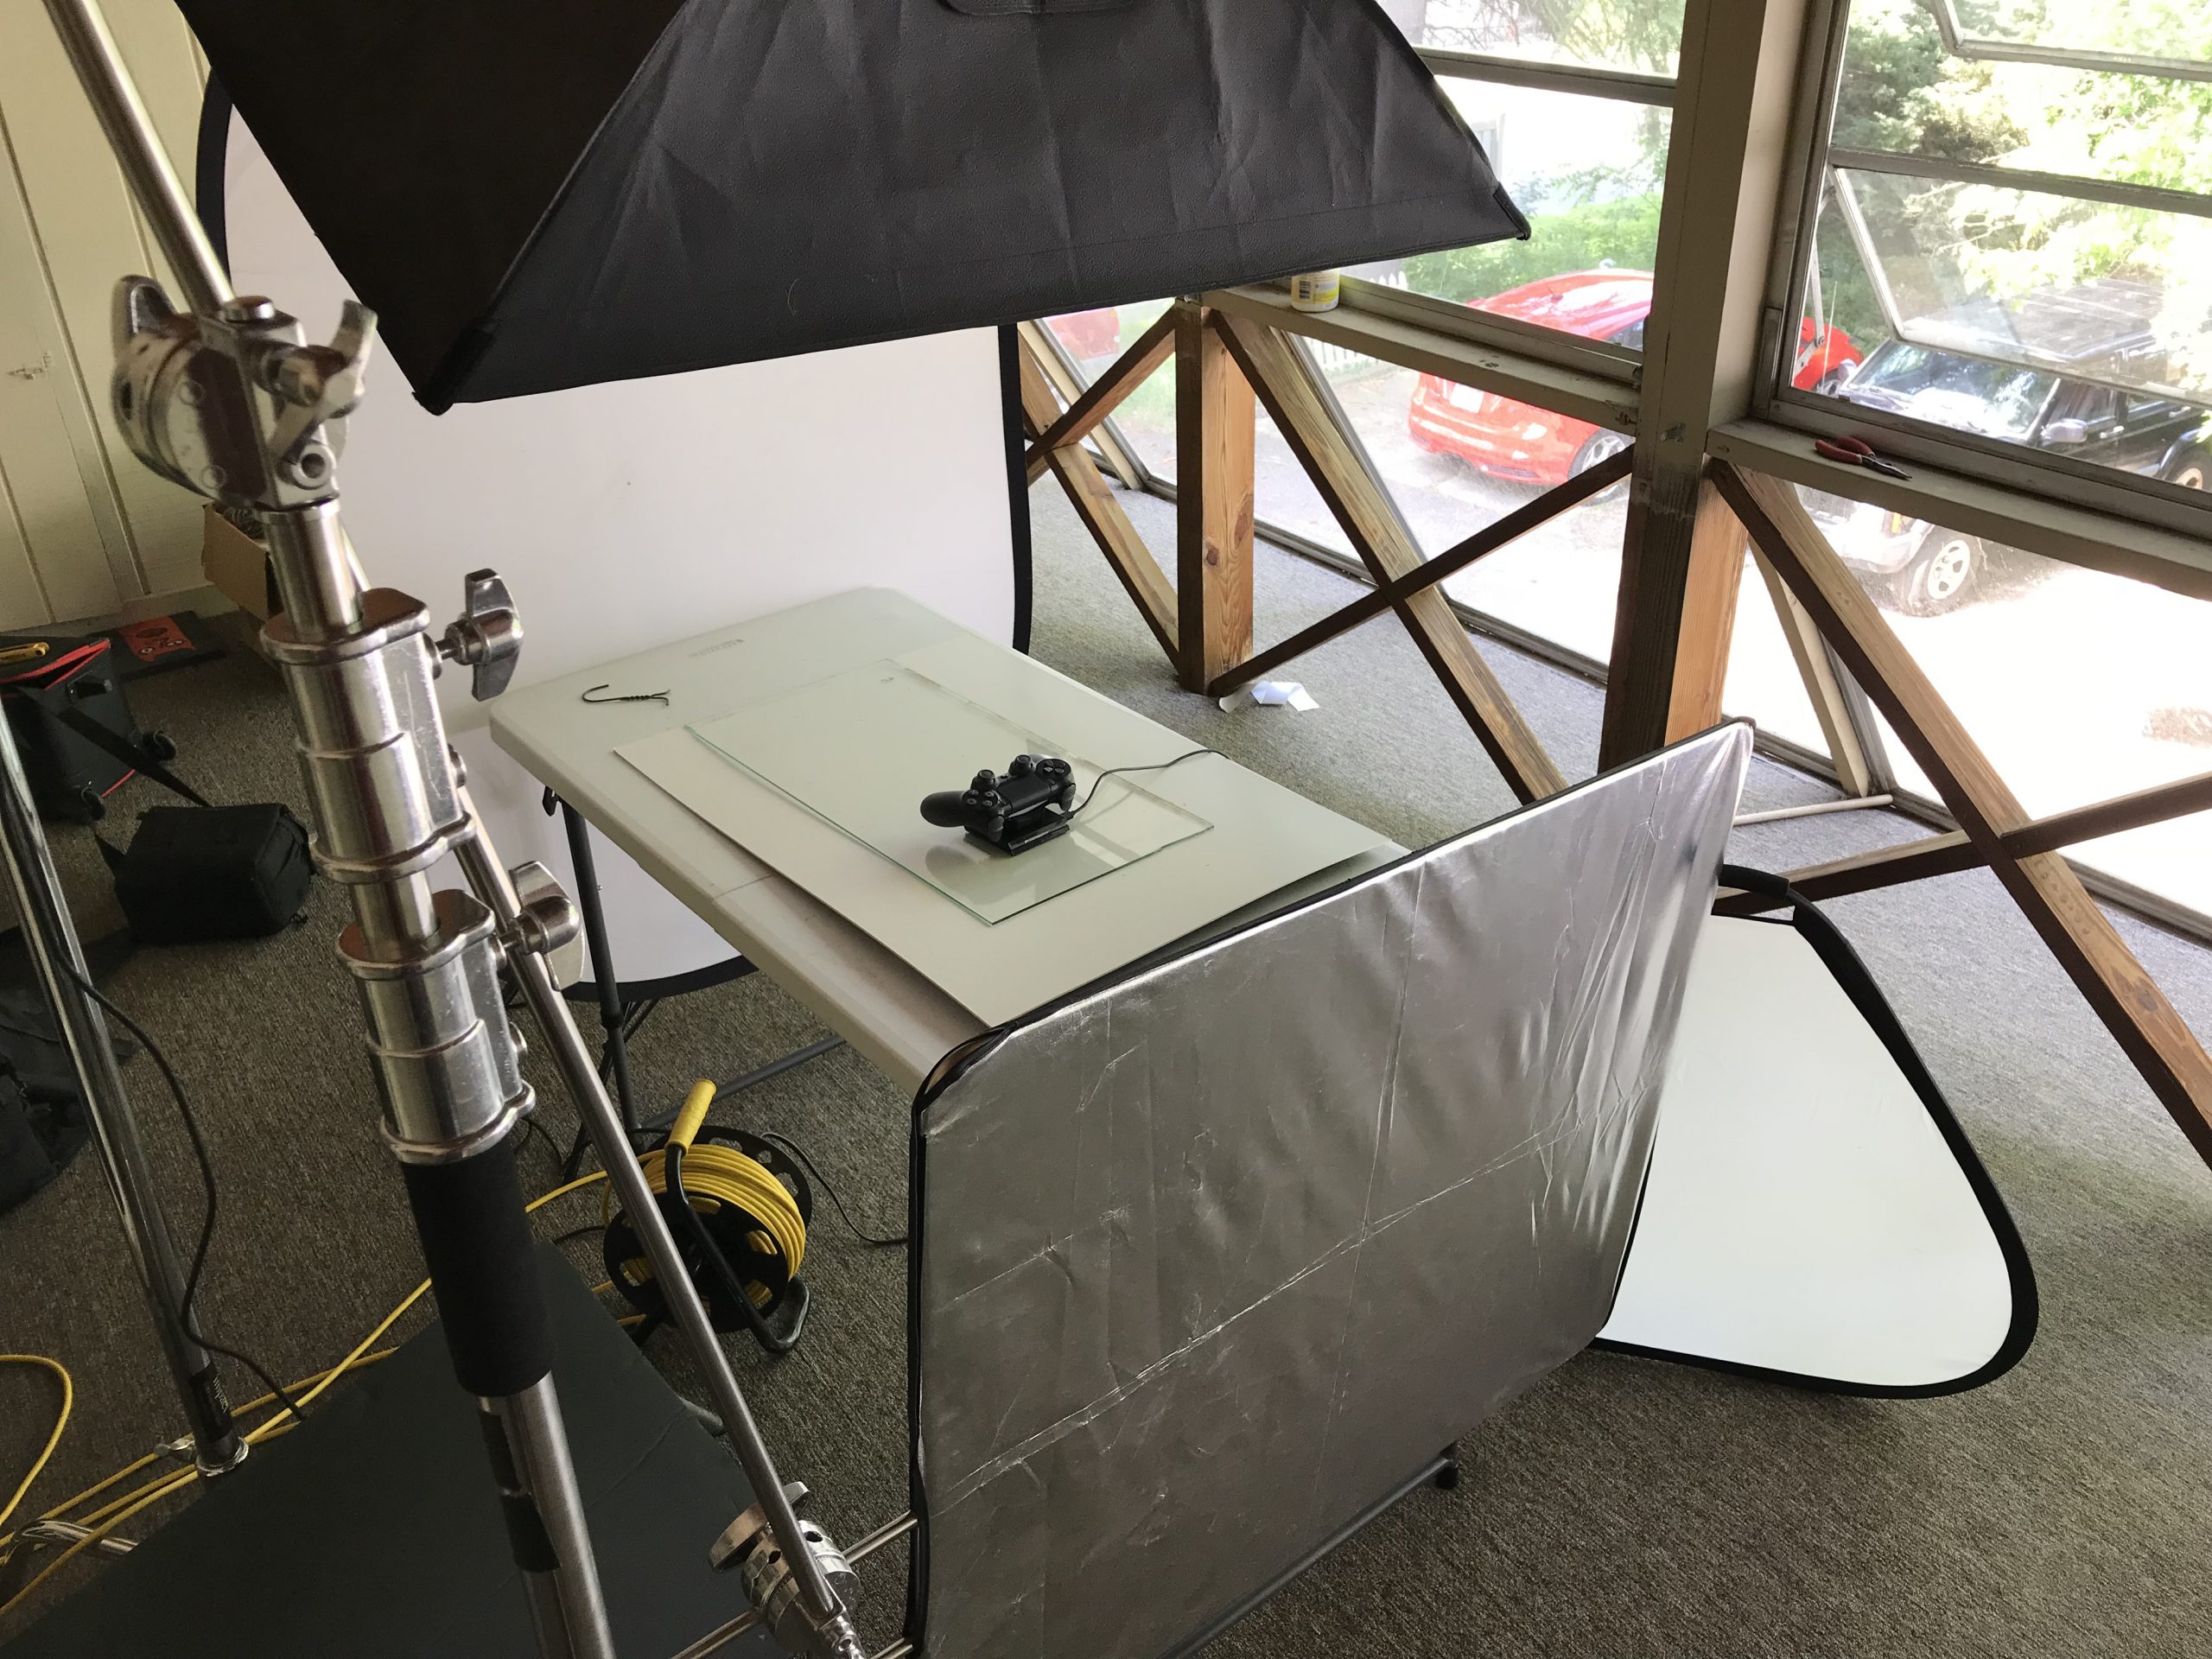
While my studio is still very much a work in progress (we’re still finishing the walls and ceiling) it was in good enough shape to get things started. When I was contracted to do some product photos we got some things set up in quick order and started taking pictures. Over here to the right you can see what the set up is for this shot. We’re using a basic, plastic, folding card table. These products are shot on white, but we also wanted a reflection, so I used a clean white card with sheet of glass on top of that to help catch reflections. We’re using a two light set up. The first light is above the product and pointed backwards towards the rear of the table. The reason for that is you can highlight the curves and contours of the product without producing the hot, specular highlights you would get if you had the light directly in front of the product. The second light is behind a collapsible diffuser. This adds a little highlight to the edge of the product, but mostly it’s just there to make sure the environment around the product is totally white. I am also using a black flag (the reverse side is shiny metallic in this photo) at the very front of the product to subject extra light from the front of the product to help make the reflections pop out a little more.
After tweaking the lighting and positioning a bit, we were very pleased with the resulting photos. It was nice to see that a little bit of planning could result in a studio space that was refined and streamlined and still produced the quality that we were looking for. You can see the results of our product photo shoot below.

