(This a completely non-paid, non-sponsored post. These suggestions are based purely on my experience.)
First off, let me just start by saying, I don’t believe in the concept of the Home Studio. I think a studio is a studio no matter where it is – Be it your living room or at a high-tech company board room, where ever you and your camera are, that is your studio.
Because of this I believe in flexibility and mobility to a degree. There’s no point in investing in gear that limits your ability to use it under different circumstances. Everything I own can be packed up, stowed away, carried, and set up anywhere I need it.
So, for this list, I am going to suggest gear and items that will let you practice your trade in any location, home or otherwise. Let’s get started!
First, camera. This one is easy: Get whatever camera system you like best.
Sony, Canon, Nikon, Hassleblad; these are all strong brands with decades of experience under their belts. The cameras they make are all great. Obviously, you’ll want a full featured camera — specifically a camera that has all of the features many look for in a ‘pro’ camera. The caveat there is that many pro features now live in lower cost models, meaning you can buy a professional camera at entry-level prices. The Canon Rebels and many of the D series Nikons are great, low-cost, cameras that will give you professional results. As for DSLR versus Mirrorless, that’s a whole ‘nuther consideration and a quick Google search will give you the pros and cons for each. Likewise for lenses; there are hundreds to choose from, but a good first purchase is always the 50mm lens. Every brand has a good, f/1.4 50mm prime lens that is both amazing and cheap.
Quick Suggestions:
- Canon Rebel T7 ($750)
- Canon 6D Mark II ($1,300)
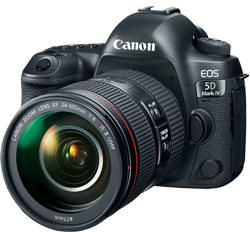
- Canon 5D Mark IV ($2,800)
- Canon EOS-R Mirrorless ($2,300)
- Nikon D5600 ($700)
- Nikon D500 ($1,800)
- Nikon D850 ($3,300)
- Nikon Z7 Mirrorless ($4,000)
- Sony a7 ($800)
- Sony a7R III ($2,800)
Next, let’s talk about tripods.
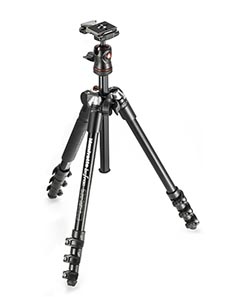
For the uninitiated this can be scary territory. The urge to spend 50 bucks on a small tripod from Best Buy might be too tempting to resist; and without knowing the drawbacks of a cheap tripod, it’s hard to know what you’re sacrificing with a low-cost purchase. You are going to have to spend a little extra money here but trust me, it’s worth it and it’s necessary. Everyone who calls themselves a professional photography will require a tripod at some point — no ifs-ands-or-buts about it. For this, I would suggest going to Amazon and just searching for any Manfrotto tripod. Manfrotto’s build quality is amazing, and for just a few hundred dollars you can get a tripod that will stick with you for years if not decades.
Quick Suggestions:
- Manfrotto MKBFRA4-BH Tripod ($150)
Next up, light stands.
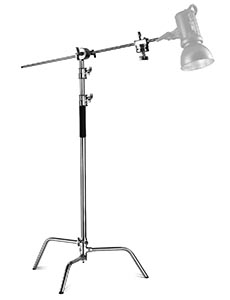
Simply put you’re going to need a light stand for every light you buy plus 1 or 2 extra. It’s okay to buy a couple cheap-o, 30 dollar light stands, but you will also want several robust stands as well. Once you’re outside and at the mercy of the wind, a 30 dollar light stand is going to end up costing you so much more in the long run — especially when your lights fall over and bust, yikes! So, buy at least one c-stand for stability and reliability, and then fill out the rest of your kit with lower cost, medium sized stands.
Quick Suggestions:
- Neweer Pro with Boom Arm C-Stand ($130)
- Impact Heavy-duty stand ($53)
- Amazon Basics 7ft Stand – 2 pack ($24)
Lastly, we’re gonna tackle lighting.
Personally, I think this is the hardest consideration you’ll ever have to make as a photographer. Where as your camera is a tool that simply captures the light in front of its lens, it’s the light itself that constructs the image you’re taking. Adding to this the many light manufacturers and modifiers available (many more than Camera makers) and the fact that most systems don’t always work very well with each other — let’s just say you have a lot to examine here.
I use two systems in my studio kit. 1 set of larger, ‘studio’, strobes and another set of smaller speedlight flashes. I use them both equally, and I have found that there are just times and places where I’ll need the benefits of one over the other.
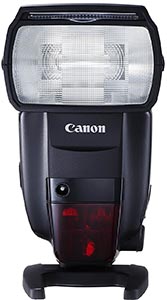
For the speedlights, I actually don’t suggest buying the cheaper knock-offs. They will work most of the time, but most isn’t always enough. I use 4 canon speedlights: one 600exrt, one 430ex III, and two 430ex II flashes, and they work ALL of the time. If there’s ever an issue with my lighting, it’s because I am doing something wrong, not the flashes.
For the larger studio strobes, however, it’s a different story. That market is filled with a bunch of manufacturers who craft incredible products. If you have the cash, then of course there’s the industry standard Profoto B1X which does everything under the Sun (with the power to beat the Sun at it’s own game, I should add). However, if you’re like me and need to be a little more frugal, you can find cheaper systems that work just as well. I prefer the flashes from Paul C. Buff. I own 3 of their studio strobes: one Einstein 640, one Alienbees B800, and one Alienbees B400. I can’t say enough great things about these flash units. In the 4 years since my first Paul C. Buff flash, they haven’t let me down – and trust me, I’ve mistreated them at times and yet they still come through for me.
You may not need 7 flashes, like I have, at the start, but you’ll certainly need at least 1. You can pretty much do everything you’ve ever wanted to do lighting-wise with just one flash – it may mean you have to get extra creative with how you stage your photo, but you can do it.
Quick Suggestions:
- Camera Brand matched Speedlight ($300-$600)
- Alienbees B800 ($280)
- Paul C BuffEinstein ($500)
- Profoto B1X ($2,100)
- Brand Compatible Wireless Triggers ($50-$200)
And to finish off our chat about lighting, you’ll need some light modifiers.
Umbrellas are the most obvious and ubiquitous choice and for good reason – they are good at what they do. They are also cheap. Maybe less obvious, and also at the low end of the cost spectrum, you can get away with a $20 pop-up diffuser and a light stand clamp to clamp it to that you then fire your flash through to create soft light.
There are also a new generation of soft boxes that pop-up like umbrellas. They are light, cheap, and fold up so quick and easy that they are almost a necessary piece of equipment for any photographer who finds themselves traveling to take portraits.
Perhaps most importantly, light modifiers are going to give you the most creative latitude when it comes to crafting light on your subject. You may want 2 or 3 different modifiers, even if you only have one light. Again, and I can’t stress this enough, modifiers will give you the most bang for your buck in terms of creating beautiful and artist light.
One quick note about my suggestions here – every lighting system is different and so they all use different methods of attaching modifiers to the lights. Do some research and find which modifiers will work with your lights.
Quick Suggestions:
- Neewer 32” Umbrella Octobox ($27)
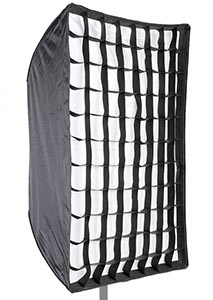
- Neewer 24”x36” Umbrella Softbox ($32)
- 2 Pack, 33” White Shoot though Umbrella ($17)
- 22” Beauty Dish ($80)
- Paul C. Buff 86” White Umbrella ($40)
- Godox 9”x35” Strip Box ($50)
And there we go, a quick start guide to the gear you may consider when setting up you studio, be it at home, or on the road!
Benjamin Lehman is a commercial photographer in the Canton, Akron, Cleveland and Northeast Ohio area.
