How to Take Portraits in a new, untested environment.
I had a really amazing opportunity to take some band photos in a space that, surpise, turned out to be the Black Keys’ rehearsal space! How cool!
I wanted to quickly run down how this photo is taken since it’s really illustrates a few basic, but important aspects of location scouting a planning.
Scouting
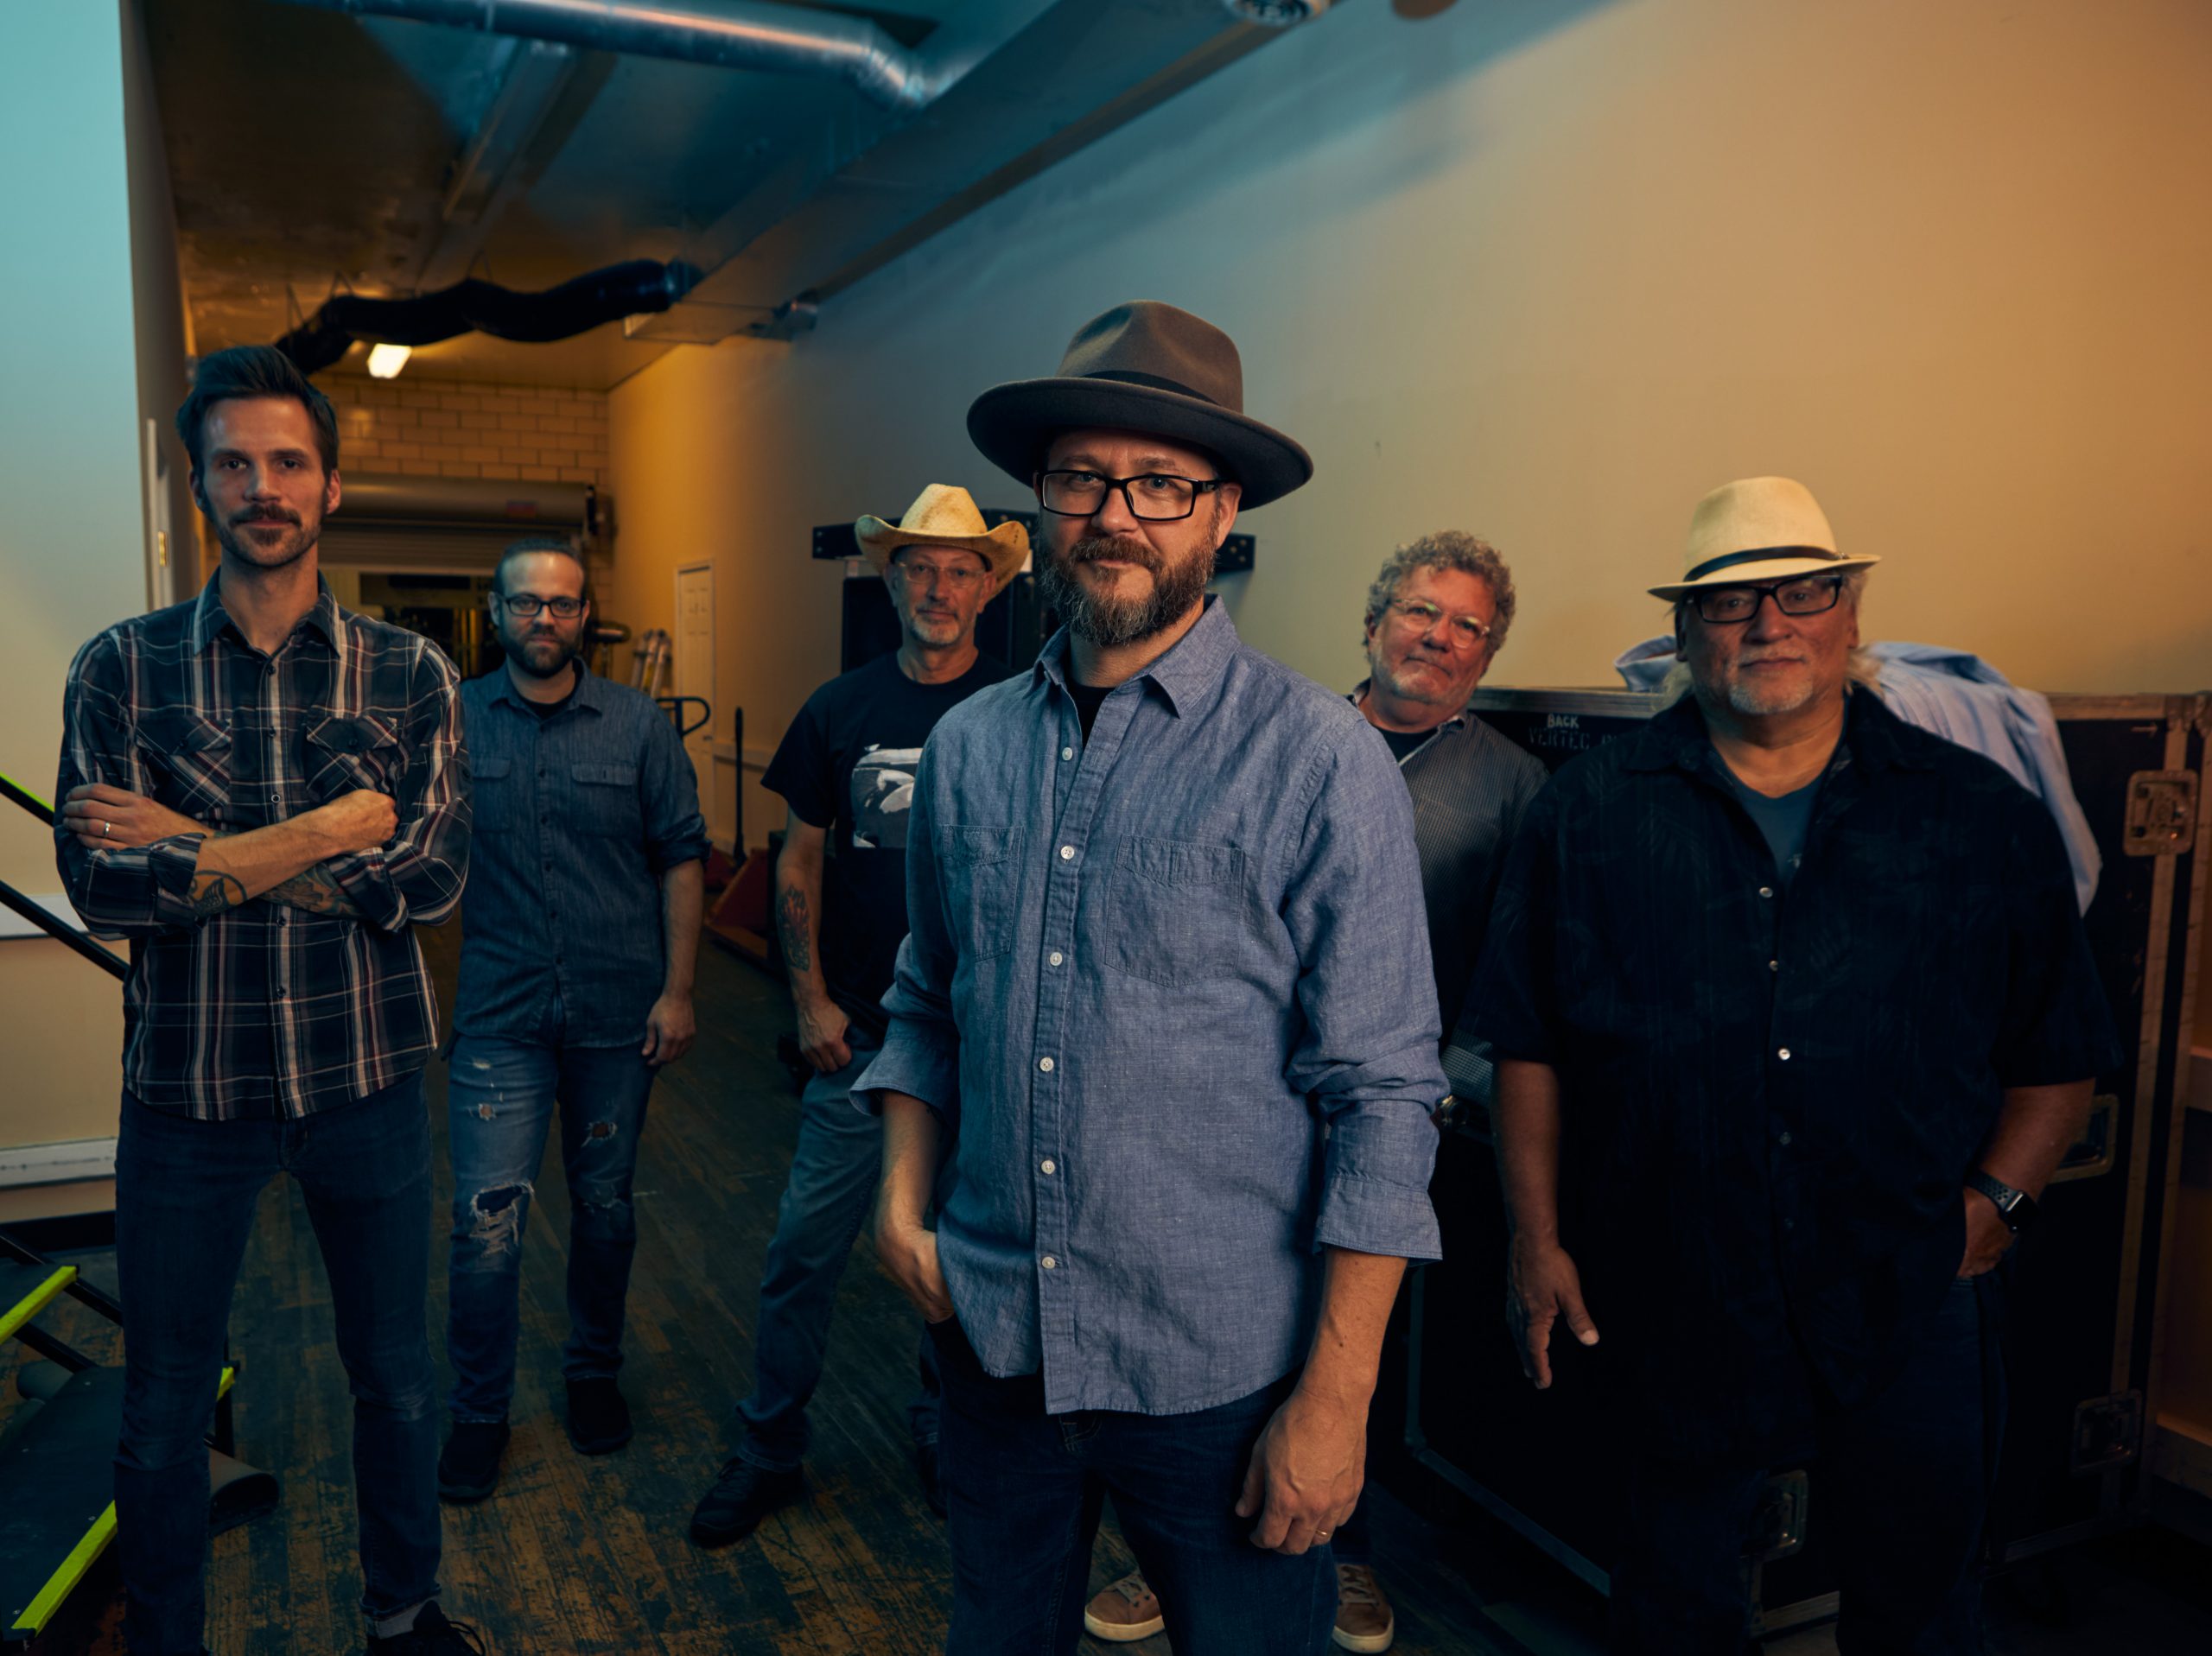
When you’re in a new location, you’ve got to make time to just look around. This being the Black Keys’ space, you know it’s going to be filled with character, but you still have to find the spot that’s going to work with your needs. Our needs were we needed a location that would work for both group and individual photos. We were moving fast since some of the band members had limited time — a specific factor like that is going to influence your choice heavily, so be ready!
Lighting
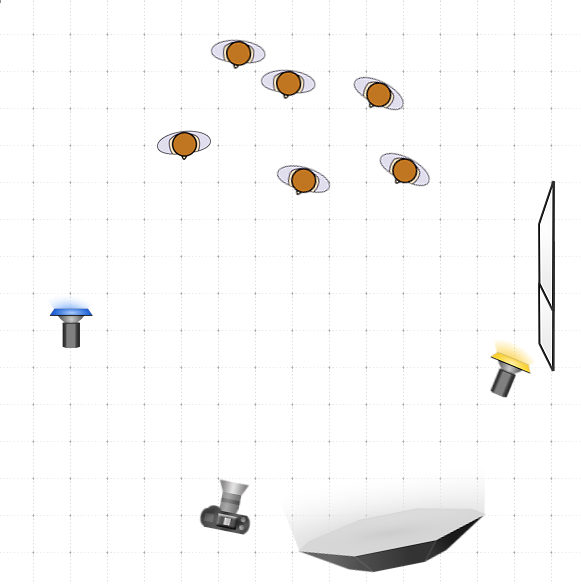 Once I settled on a location (a cool hallway filled with touring gear) I send the band off to their rehearsal and started to set up my lights. I knew I was going to to use 3 lights and my plan was to gel two of those lights with complimentary colors.
Main Light
The mainlight was a 51 inch reverse-bounce umbrella known as a soft-lighter. I set that up at the beginning of the hallway, facing down towards the band. I am using this light to both fill in shadows (so it’s acting as a fill, to some degree) but also make sure the main features of our subjects aren’t overly washed with color from our other two lights.
Fill Light
Our fill light is an orange gelled Alinebees 800 with a reflector dish pointed at the wall. I am using the wall as a bounce so I can effectively turn it into a massive softbox. The light is just about 1 full stop of power less than our main light.
Ambient Light
There’s a technique I don’t see used EVER in photography, or at least it’s never mentioned, and that is the use of a strobe as an ambient light source. Just to define what I mean by Ambient — it is a source of light that lives everywhere through the photo. That may not initially make much sense, but in a practical sense your ambient light is the light that you control using your shutter speed. We all know that even when you’re using a lot of strobes to light your photo, you can turn your shutter speed down far enough so that more light bleeds in from the environment – that light is the ambient light.
The cool thing is, you can actually use strobes to control that as well. The only two rules to creating ambient light is:
- That your ambient light strobe washes evenly throughout the photo
- That your ambient light strobe’s power is higher than the natural light but weaker than your main flashes.
To tackle rule #1, making sure the light reaches everywhere, I had the flash pointed at the ceiling. This meant the light bounced up and then cascaded down throughout the photo evenly.
Rule #2 is easy, you just dial it up or down until you only see it’s influence in the shadows of your subjects. In our photo you can see the ambient light (gelled as a deep teal) on the walls and on the shadow side of our subject — Perfect!
Taking Photos
The next step is the easy part! And working with a group a guys like the Yankee Bravo crew just makes the process of taking photos easy and fun! Over the course of about 30 minutes we worked through several different set ups and then we were outta there! I’ve attached the lighting diagram so you can get a rough idea of where I had everything placed and the final photos are here to show you what we were able to create!
It was an amazing experience, and the band (Yankee Bravo – go check em out!) were just the best group of guys you could ask to work with. The space was amazing to work with as well. Just everything about this shoot was so amazing!