Product Lighting How-To Made Easy!
I usually try to make these behind-the-scenes/tutorial posts as short and to the point as possible. The hope is you are able to get all of the information you might be looking for without all the fluff. So, let’s give it a go!
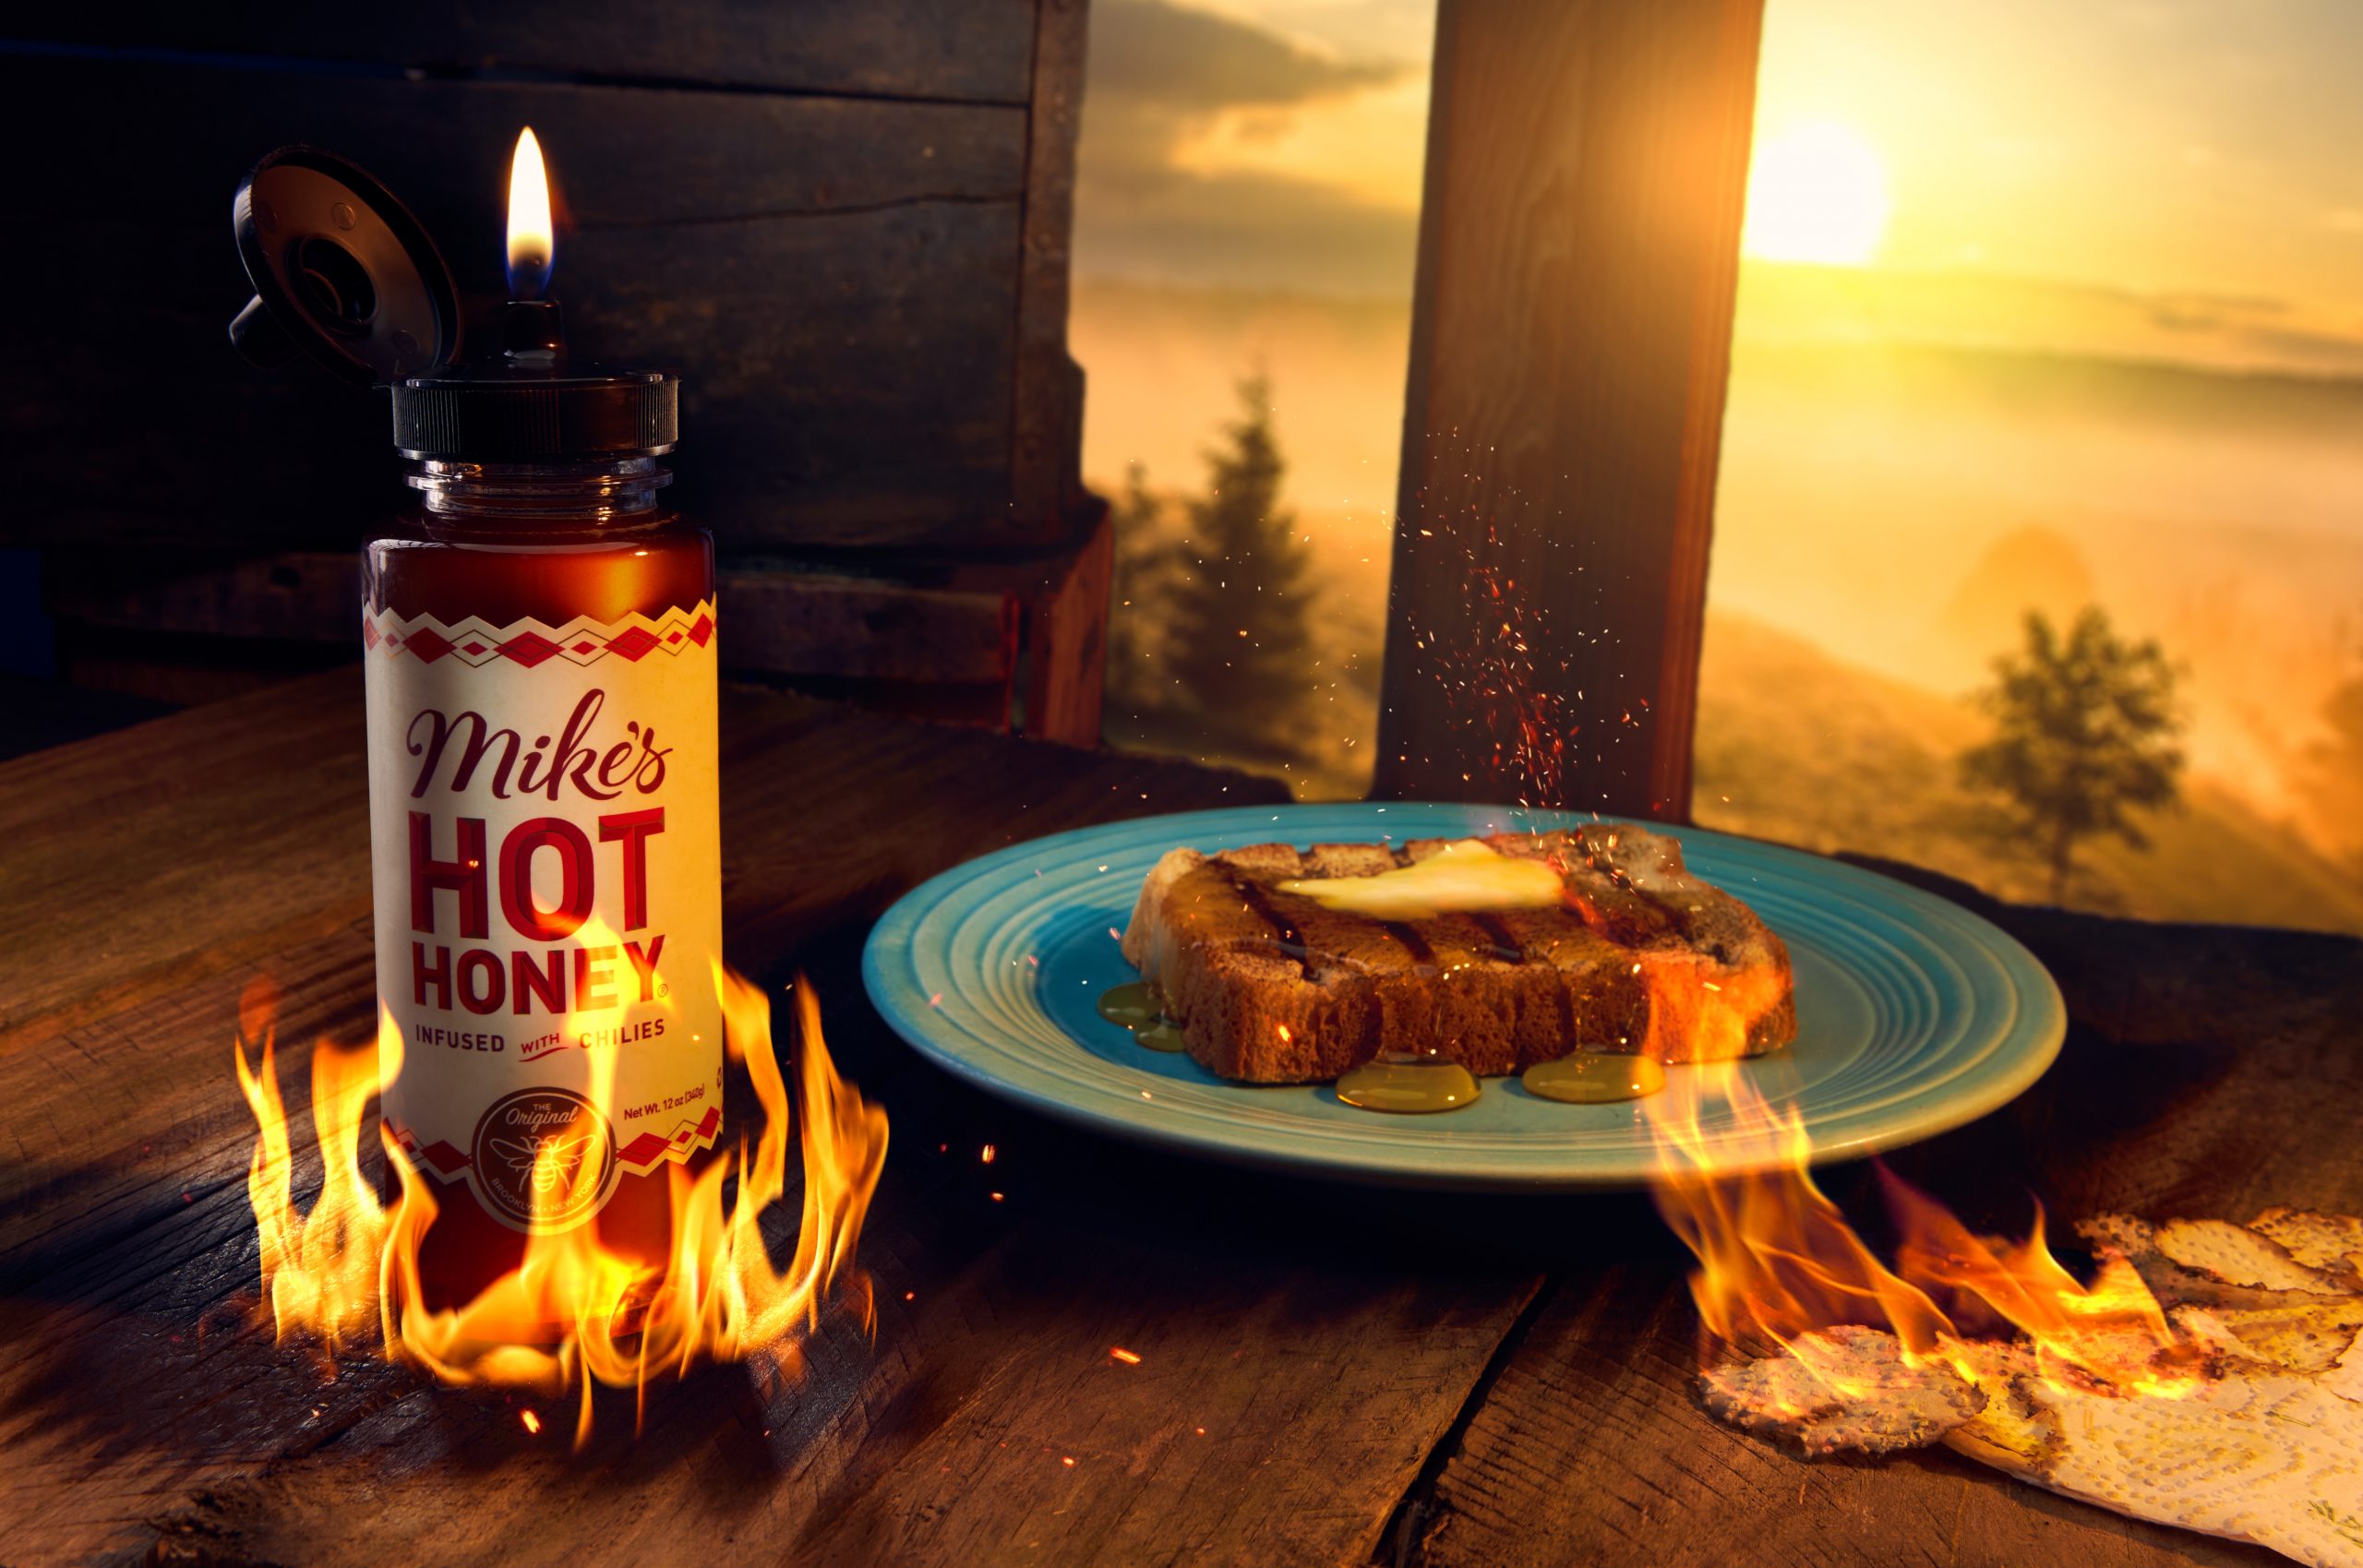
I was recently introduced to Mike’s Hot Honey and instantly fell in love with it. If you like spicy things then I strongly recommend this product for pretty much anything you could put honey on, and maybe even a few things you normally wouldn’t.
In order to show my appreciation for their honey, which helped me through a rough cold season (hot honey and tea, yum!), I decided to give thanks by taking a fiery product photo!
Step 1 – Styling
I used some old crates as the backdrop. I also had some old glass doors I previously aged and distressed to use in the background. For the table top, I used some old palette wood that I then burned with a blow torch to give the visual suggestion that the honey was so hot that it was burning the table top.
Step 2 – Staging
Get the products in place – There are tons of great tutorials out there that show how to become a successful food photographer – this will not be one of those. All we did was place the hero product front-and-center and then offset a plate with some toast, butter, and drizzled honey to the side of it. I “toasted” the bread using the earlier mentioned blow torch and then used a metal rod, also heated with the blow torch, to burn some lines in the bread, mimicking that old school toaster look.
Step 3 – Lighting
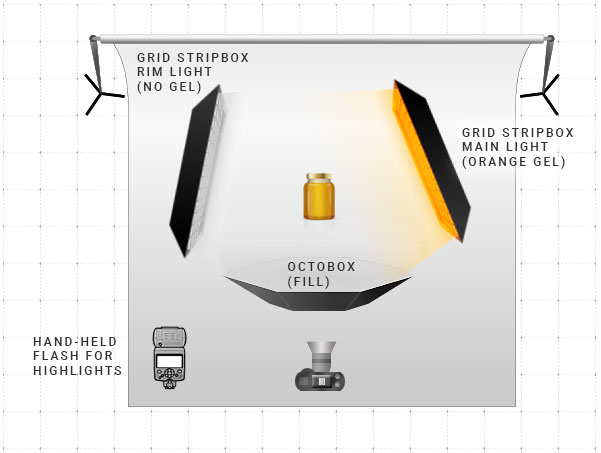
This is the part I love the most. We used 4 separate lights for this image. One Paul C. Buff Einstein, two Alienbees, and one old school Vivitar 285. Yes, an actual 285! We ended up using this old flash because it’s easy to hand hold and it has a very reliable optical slave attachment that makes it so I don’t have to deal with an additional radio remote. For the other three lights we are using Paul C. Buff’s flash commander system.
The lights were set up as follows:
- Strip box to camera right, gelled orange – this is our main light as it contributes most of the light to the scene
- Strip box to camera left, un-gelled and acting as kicker light to give the honey bottle some separation from the background.
- Octobox on an C-Stand, hanging above the table, pointing straight down. This is our fill light as it just helps even out some shadows
- Hand-held Vivitar 285 speed light used for highlighting small details.
Here is a diagram for those of us who are visual oriented learners.
Step 4
Start taking pictures! This is the stage where you are adjusting your lights so they work in concert with each other. For our picture the ratio of power from Main Light, to Kicker to Fill was something like 1 : 0.5 : 0.25
Basically that means from most power to the least, each light was about half the power of the last. Your ratio will be different! Experiment! But this is a good starting point if you are trying to recreate a similar look. Also worth remembering; the distance of your light source to the subject also determines the apparent power of the light, so be sure to play with power levels and distance!
Step 5
Keep taking pictures! This is a composite job, folks. Our final image is actually something like 18 separate images stacked on top of each other. Remember that hand held Vivitar flash I mentioned? Well, I would move it from one picture to the next, trying to find small details to highlight. When you are working in a studio environment and have a limited amount of flashes to use then this method is a life saver. By taking multiple photos you can create the look of a massive studio with 10s of flashes. You can do this whole product shoot with just one light if you wanted to!
Step 6
Bring the files into Photoshop and start compositing! The gist here is to stack all of your exposures as layers in a single file and then use masks to save the best parts of each photo. Then go in and add the small details, like fire and embers, that really bring something like this to life. Here is the final composite!