Stacked and Layered Photos - How to Composite Multiple Photos Together To Make One Image
I’ve wanted to write this post for some time now. This is a very straight forward technique that only requires a little thought and pre-planning to pull off, but the results could save you a lot of time on location as well as money that would otherwise be spent on gear.
A composite is a picture that is crafted from elements from multiple sources, usually other photographs. The pros of compositing is that you can use small amount of gear to achieve a final product that looks like it involved a much larger production. For instance, you can take one light and position it in 5 different locations, taking a photograph each time you move the light and then use tricky compositing techniques to craft a final image that appears to have 5 separate lights in it. Make sense?
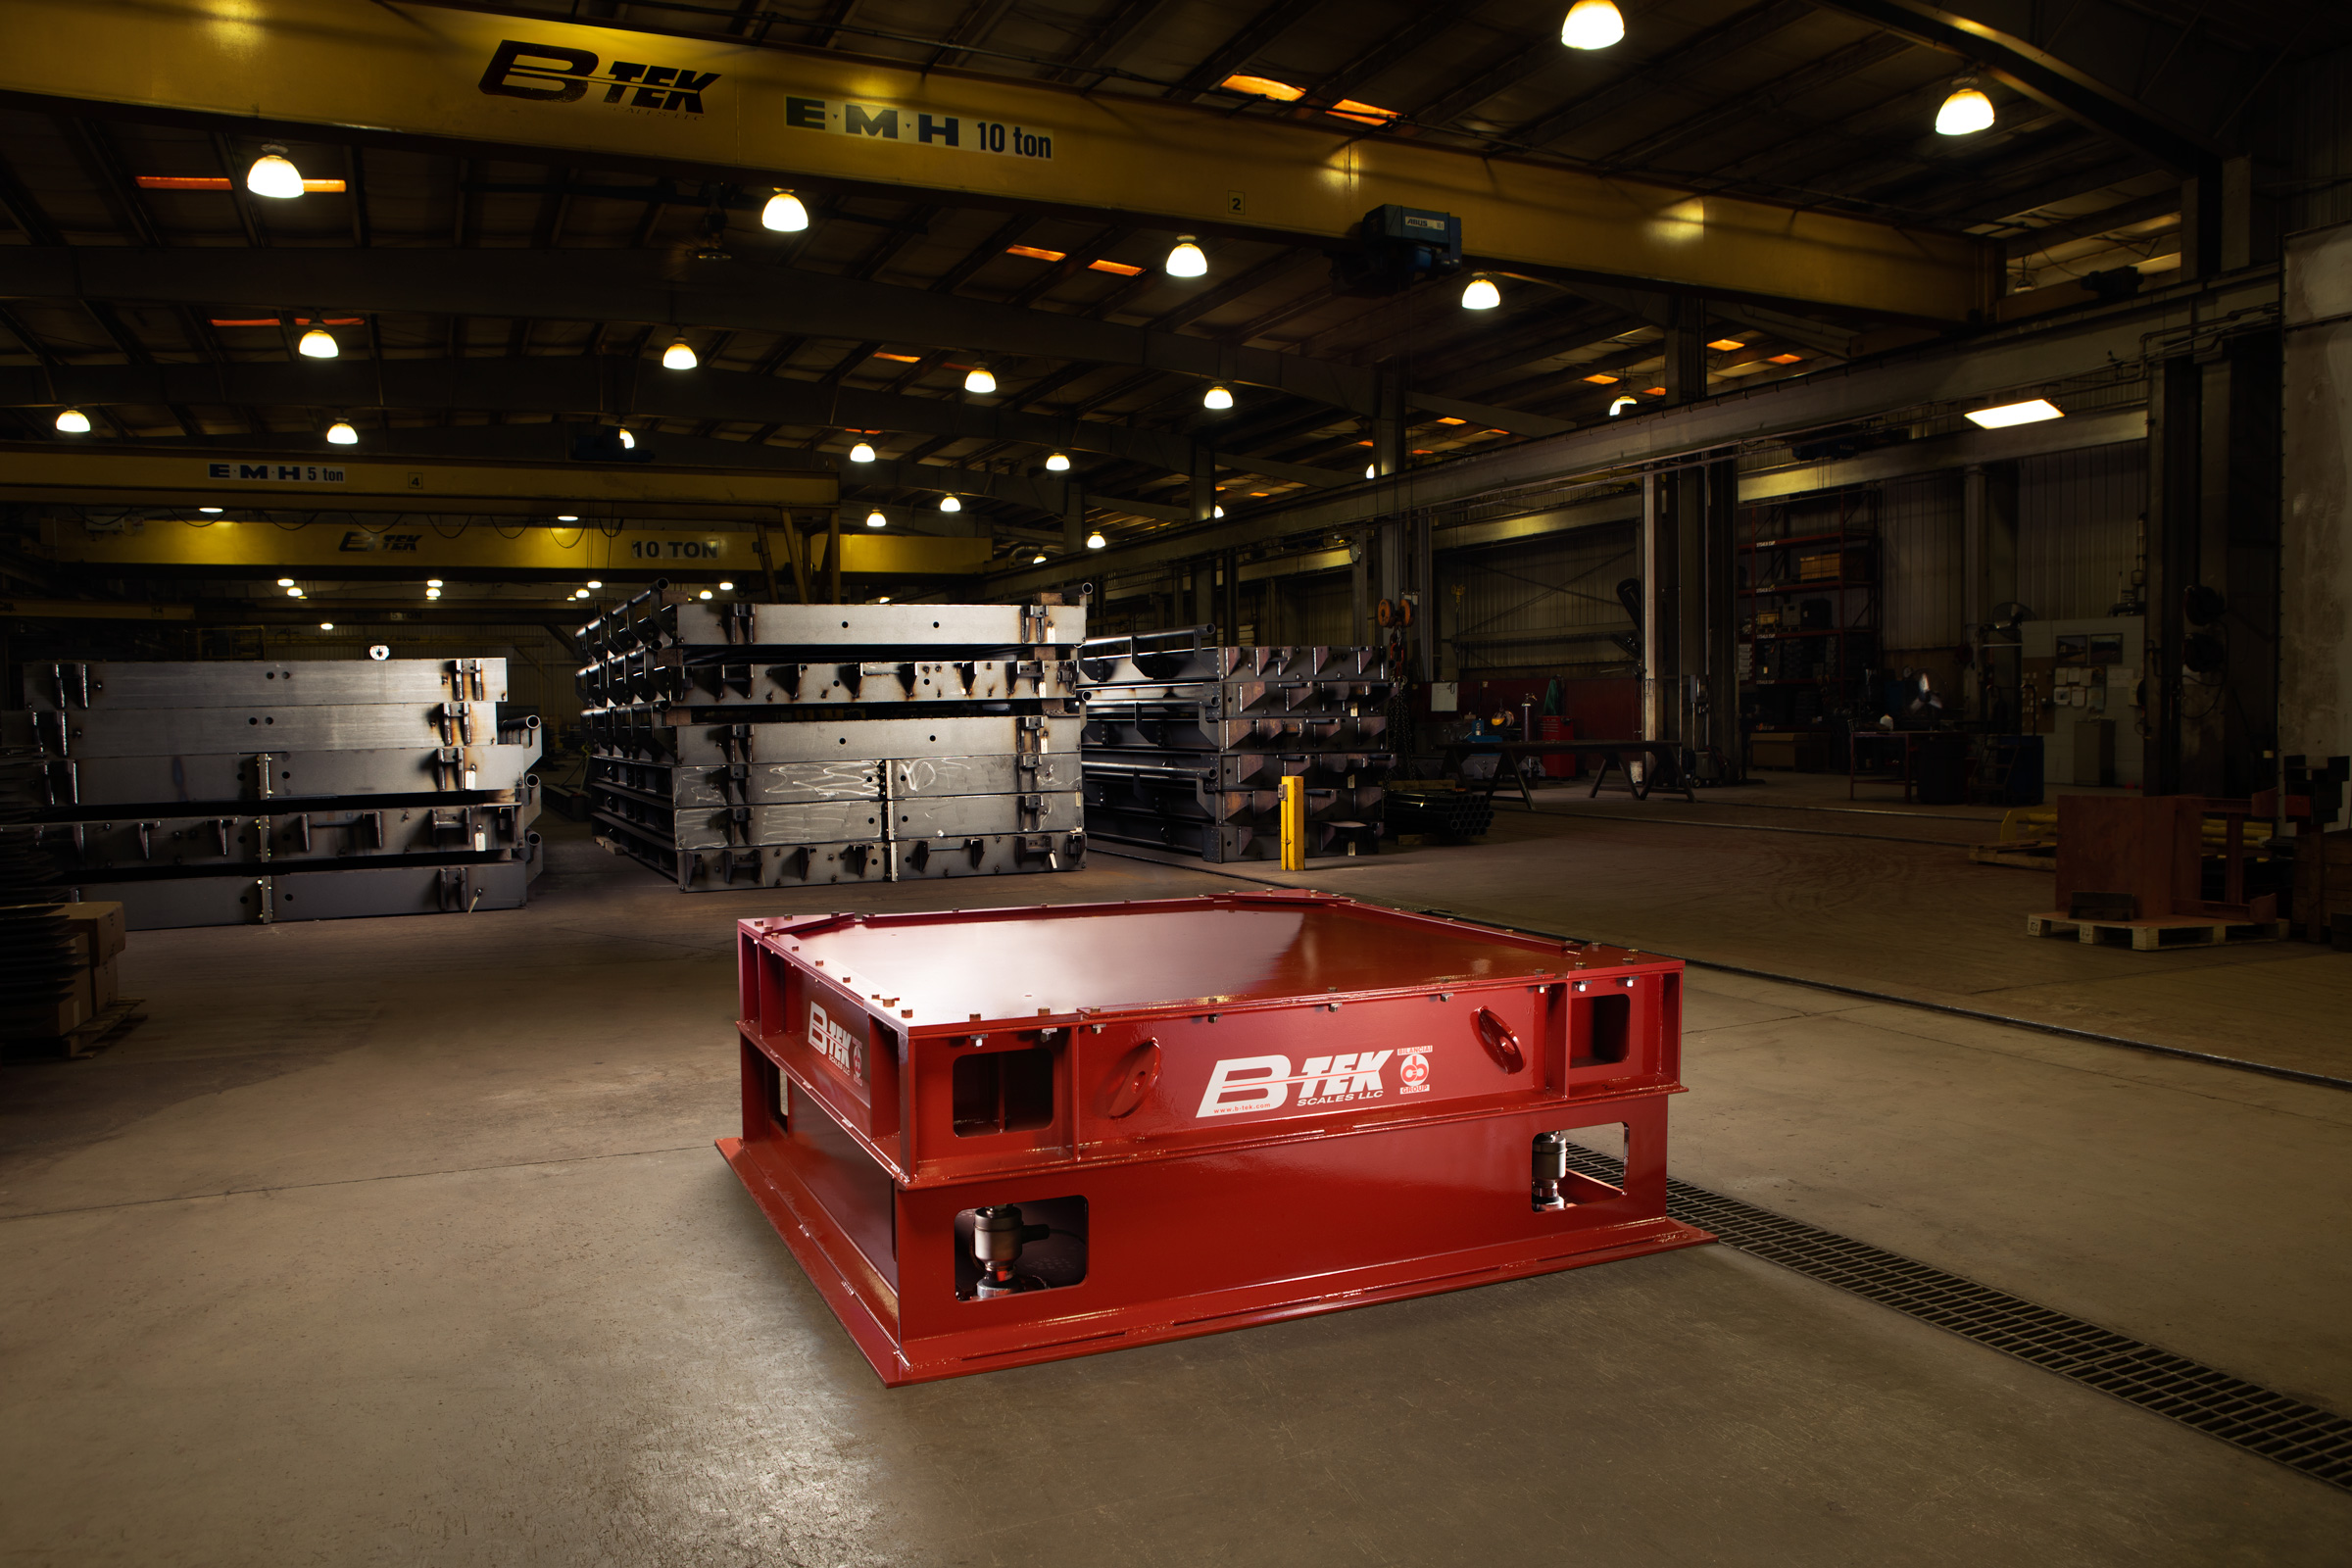
Let’s use some examples from a recent job I did for B-Tek – a high impact, heavy load scale manufacturer. They had a massive scale that weighed several thousand pounds at least that they needed photos for. After doing a quick location scout I realized their warehouse would make a great backdrop for our photo. The trick was how to make the product stand out from the busy warehouse, but also craft the background into something that was pleasing and helped tell the industrial-strength nature of their product. It would take 20 lights, at least, to pull this off. That investment in lights would be many thousands of dollars and is just not feasible for me. So, instead of relying on 20 different lights we just take 20 different pictures, moving the light between each picture, and edit them together in a manner that recreates the use of multiple light sources.
The photos below illustrate a few examples of how I move the light between each take.
The process here is pretty straight forward – Light the subject and location as you would if you had 20 or so lights, only do it one photo at a time. Take care to note what you’re lighting and make sure you’ve got everything covered by the time you’re done. In some cases you can fake it back in Photoshop if you missed one light position, but it’s better to get right during the shoot rather than try to recreate something you’ve missed.
The next step is to open all of your images as a stack in Photoshop. “Stack”, is a term used by Photoshop in its File menu, but what you are actually doing here is opening all of these images and putting them on separate layers inside of one document. The next part of this technique is to use the mask tool on the various layers so you are only keeping the parts you want visible. The idea is to keep all of the good parts and, as a whole, create a single, coherent photo. This step can be hard to pull off on the first try and we’re not going to get into the nuts-n-bolts of Photoshop masks since there are great tutorials out there (like this one from Phlearn) but the concept is to only keep the parts of each layer that you’ve purposely lit with your flash and discard the rest. Here is a very simplified animation I created to show you the key process of stacking.
Yes, this animation glosses over all of the masking needed to pull off the final image, but I think it’s important to see the idea of multiple layers in action since it will be those individual layers that will allow you to make your final composite. Once you’ve finished masking you’re almost all set. What’s left are the final tweaks, such as color correction, spot removal, product beautifying, and over all clean-up. In our case, here’s the final image we created.

In the end, this technique worked great for the shoot and the client was thrilled – and that is always the best part!


